
 Having a larger stereo, extra lights and more accesories in your car means more power being needed to run it. Thus, you would need to have an auxilliary battery installed. In order to efficient manage the electric consumption of your accessories, a smart dual battery isolator kit is needed.
Two batteries may be charged simultaneously using the smart isolator technology. As soon as either battery reaches 13.4 volts when the engine is running, the relay (svr) turns on, enabling two battery banks to be charged concurrently. The voltage sensitive relay disconnects, separating the batteries, when the voltage falls below 12.9 volts (for instance, when the engine is turned off but the accessories are still operating). The starting battery is no longer at risk of being drained, and this technique shields delicate electronic devices running on the home batteries from potentially hazardous engine start-up surges.
Here the steps on how to install battery isolator in your vehicles
- Study the battery isolator installation diagram.
- Place the second battery on the battery tray located in line with the driver’s side of the car. Secure this new battery using a 3/8-inch ratchet and socket.
- Install the TRUE smart battery isolator on the fender well using a drilling machine. Self-tap the screws and the bracket of the isolator.
- Let a 4-gauge battery cable run from the first battery’s positive terminal to the right-hand side terminal of the TRUE smart battery isolator. Both ends of the wire should be stripped by half an inch with the use of a terminal crimper. A 3/8-inch ratchet and socket is used to connect the positive terminal of the first battery to that of the smart battery isolator.
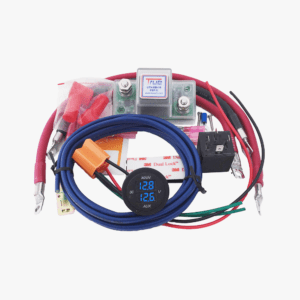
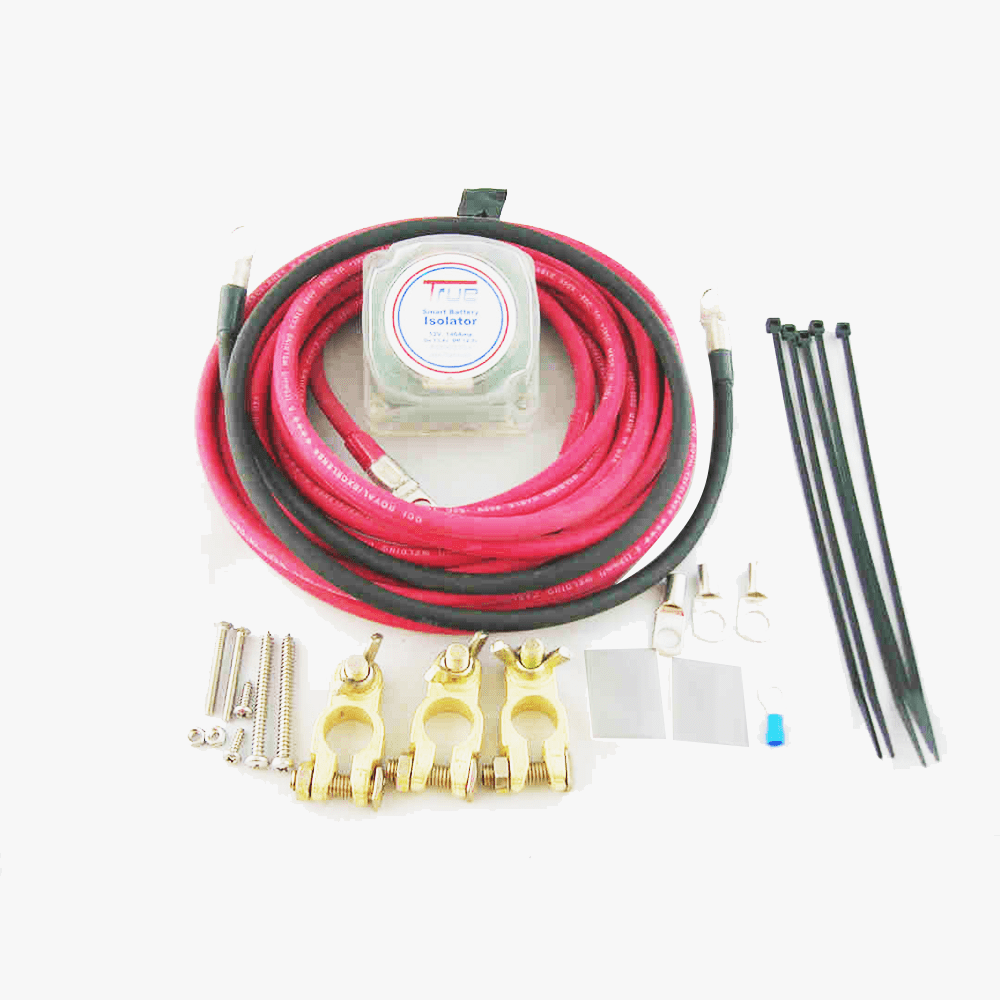
KIT INCLUDES
- 1 140 Amp Voltage Sensitive Relay
- 1 19’ 8” length of battery cable
- 1 Ground Cable
- 2 Positive brass marine type battery terminals
- 1 Negative brass marine type battery terminal
- Tinned copper lugs, heat shrink & Cable Ties
- Easy to follow instructions for Dual Battery Wiring Diagram
- Let another 4-gauge battery cable run from the second battery’s positive terminal to the left-hand side terminal of the TRUE smart battery isolat or. Again, both ends of the wire should be stripped by half an inch with the use of a terminal crimper. A 3/8-inch ratchet and socket is used to connect the positive terminal of the second battery to that of the TRUE smart battery isolator
- Connect the attached black ground wire of the isolator to a common ground on the metal frame or firewall. If need be you can extend the ground wire with a butt splice and attach it directly to one of the battery’s negative terminals.
- Lastly, connect the negative terminal of the second battery to the frame’s ground point using a 4-gauge wire. Fasten on both ends.
READ THE TESTIMONIALS CLICK HERE!!!
The second battery, the one you just installed, will be charged only when the alternator has charged the first battery to a level where there is 13.3 volts available at the isolator. Installing a second battery and a battery isolator is quite easily done even without supervision. This manual on HOW TO WIRE and INSTALL A BATTERY ISOLATOR makes the process easier.
1. UTV dual battery and switch plate install and setup for Honda Pioneer 1000
2. Install battery isolator and Dual Battery Setup for Truck Camper Shell by Overland Camping
3. Honda Pioneer Dual Battery installation with Isolator Kit
4. RZR XP 1000 – How to install dual battery and isolator kit to RZR XP 1000
5. Polaris RZR 900 -Install Second Battery using True Amalgamated Smart Isolator on my Polaris RZR 900
6. 2022 Honda Pioneer 1000-5 Deluxe dual battery installation video and battery isolator switch wiring
Tags: how to install a dual battery system in a vehicle, Silverado dual battery switch, dual battery setup boat, car dual battery isolator switch,


Great help!! Cut and dry! Isolator works great! Thank you for the info.